
Configuring and managing your server
How to Convert Client Modpack Files to Servers Files
Are you eager to play your favorite client modpack on a server with friends but can't find an existing server version? This tutorial will guide you through the process of converting client modpack files into server files, ensuring you can enjoy a seamless multiplayer experience. Let's dive in and transform your modpack for server play!


When it comes to playing modded Minecraft, many players prefer to play on servers with their friends or a community. However, finding a server that runs the exact modpack you want to play can be difficult. Sometimes, you may find a client modpack that you love, but can't find a server running that exact version. In this case, you may need to convert the client modpack to a server version. Here's a step-by-step guide on how to do just that, by following them, you can easily convert a client modpack to a server modpack and enjoy playing with your friends on a server.
Check if a Server Version of the Modpack already exist
Before converting a client modpack to a server modpack, it's important to check if a server version already exists. This can be done by searching for it on third-party launchers, such as FTB Legacy, ATL, Technic Platform, and Curse Launcher. FTB Legacy and ATL usually include server versions, while Technic Platform and Curse Launcher may or may not have them.
If a server version does exist, you can install it onto your server after properly setting it up. If not, you will need to proceed with converting the client modpack to a server modpack.
Obtain the client modpack files
To obtain the client modpack version, you will need to locate its saved location, which can usually be found under the modpack's settings. The location will vary depending on the launcher you're using.
Once you've located the saved location, you will need to find the folder with the name of the modpack and the client files used to run it. In this folder, you should see the "mods" and "configs" folders. These two folders are what make up the modpack, and it's important that the config files stay exactly the same when converting the modpack to prevent mod ID conflicts. Take these two folders and place them into a new temporary folder, which will be the start of the server modpack.
Add Forge Files
Next, you will need to obtain the server's core Forge jar files, which run the server and its mods. Since the client version uses a client-side version of Forge and not a server-side version, you will need to download the respective Forge server jar from online. You can find the correct Forge version by running the client-side version of the modpack and checking the Forge versioning details in the bottom left of the main menu.
Download the Forge server installer from Forge official website and select the "Server" option. Install it into the new folder you created previously, even if you receive a warning that the folder is not empty. After a few moments, the installer will download the Forge server files, and you should end up with 3-4 new files, one of which is a log file detailing the installation process. You can discard this file, and the remaining files should be "libraries", "minecraft_server.jar," and "x.xx.xx-forge.jar."
At this point, your server modpack folder should contain five files: "libraries," "minecraft_server.jar", "x.xx.xx-forge.jar", "mods", and "configs". These files are what make up most modpacks and can run without any additional files.
Remove Client Side only Mods Files
Before you start converting your client modpack, it's important to check if the mods in your pack are compatible with servers. Some mods are designed only for single player use and may crash your server. Make sure you read through each mod's description and check for any compatibility issues before proceeding.
Most of the time, the mods dedicated to the client are GUI Mods that customize the screen interface, as Minimaps, shadders or inventory.
Anyway, if you forgot some, you will get an error in your crash report files, with the mod that can't be loaded by the server, you may need multiple try to find all of them, since only one will be displayed at once.
Reseting your server
Not mandatory, but better to start from a clean install to avoid potentials conflicts or incompatibilities.
1. Navigate to "Versions" panel.
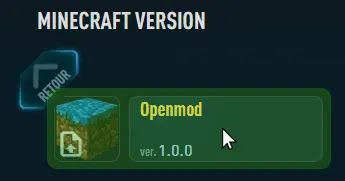
2. Choose "OPENMOD" pack for installation.
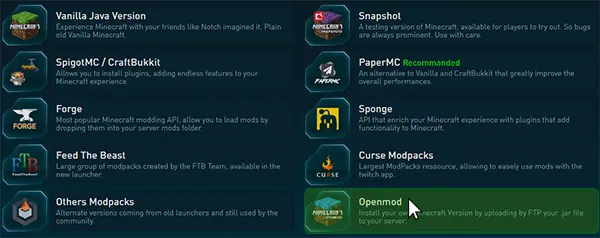
3. Click on "Openmod" pack.
4. And click on "REINSTALL" for installation

5. Wait during the process.
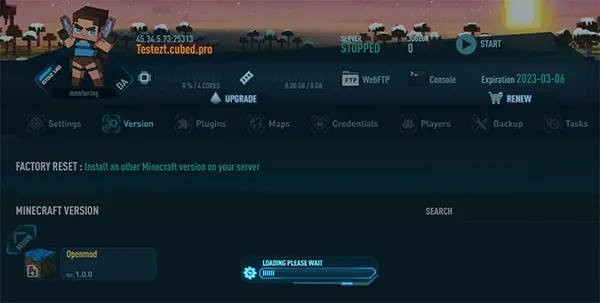
Your previous server files are now deleted. You can directly upload your custom jar file to the server.
You can use the WebFTP or an FTP client of your choice.
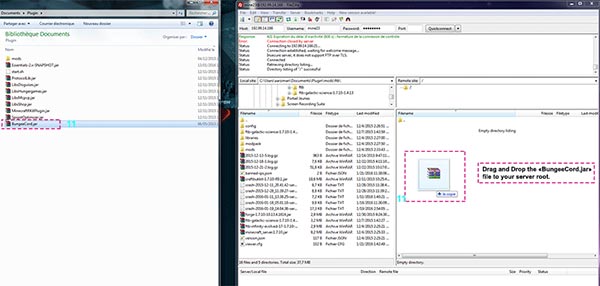
Upload Your Server Files to Your Server
We will use an FTP such Filezila or Winscp, to faster the transfer, the WebFTP is mainly to edit configuration files or upload mods and plugins.
1. Go to "Credentials"

2. Note the address, user and password
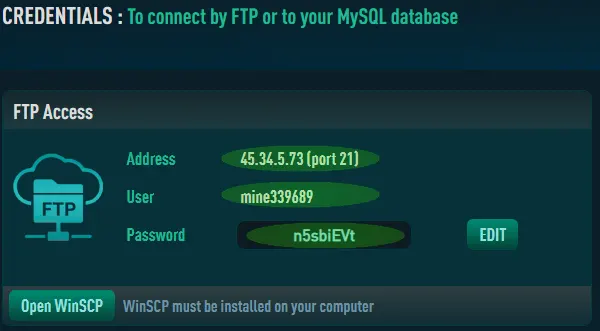
3. Open Filezilla or WinSCP and enter your FTP Credentials, then click on Connect

4. Select the server files that you previously created, from your computer and drop it into your server folder.
Activate your custom Jar
Once you have uploaded your server files, you need to tell the server to use it.
1. Go to "Settings" panel.
2. Click on "Server Version", select under --Uploaded on FTP--"x.xx.xx.forge.jar" your server jar.

3. Click on "SAVE CHANGES". 
4. Start the server with play button, on the top of your panel.
5. Go to "Console" panel, to see if the server has started successfully.
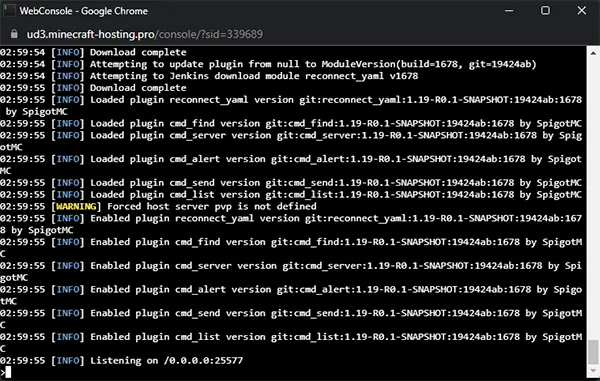
If everything is ok, you can enjoy your new modpack.
Of course, you need to use the same version on your client, do not forgot to let the client mods on it.