
Configuring and managing your server
How To Add a MySQL Database to your Server
 If you have used certain plugins before, you may have encountered the requirement of a MySQL database. These plugins generate a lot of data, which can be conveniently stored in tables, much like how data is stored and managed in a spreadsheet. You can create a single database for each server, along with any necessary tables.
Creating a New Database
To create a new database, access your server's details page and navigate to the "Credential" page, MySQL section.

From there, you can create and manage your database and use its credentials to link it with your plugins.
By default the Database is not created, you need to chose a password to create it.
1. Locate the password field, and enter the password your want, then click on "ADD" button.
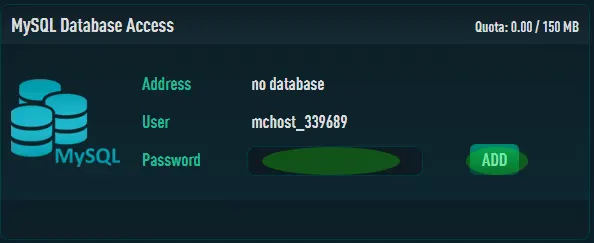
2. Wait for the Database creation

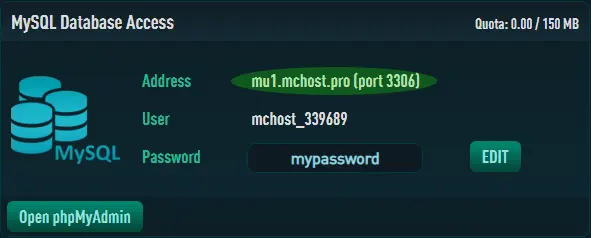
3. Once the Database is created, you can now see the Address / Port to use to connect, and a new button to access to phpMyAdmin.
Connect to the Database
Most plugins require the same set of information to connect to the database, such as :
IP address / Port of the database host,
Database Name to use (if there are multiple databases on the server),
username and password.
Simply configure them in your Plugins/Mods configuration files,
Administrate your Database
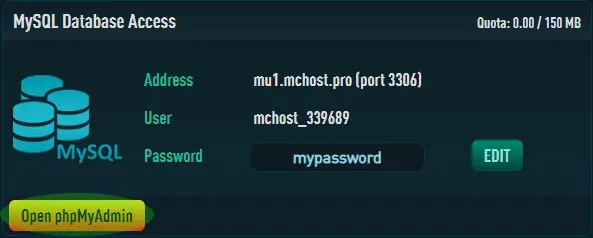
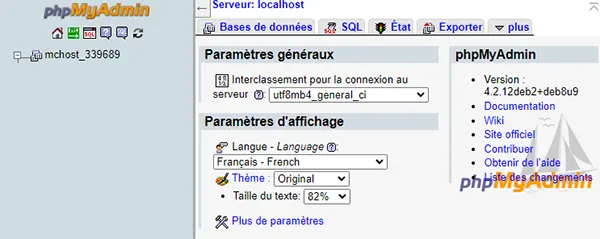
1. Access to phpMyAdmin to administrate it, with the button "Open phpMyAdmin"
2. Enter your Login and Password, displayed on the Credential page.
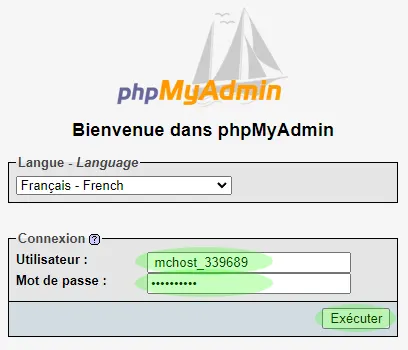
3. You are now connected, and can administrate your MySQL Database.
Resetting MySQL Password
if you need to change the password for your MySQL database, you can do so from the Apex Server Panel. Simply navigate to the Credentials page, and enter a new password, as you did the first time to initiate the database.
Remember to update the credentials for any plugins that use this information after resetting the password.
Get Started with a
Minecraft Server
Looking to create your own minecraft server? It only takes a few minutes.