
Configuring and managing your server
How to install and use Simple Voice Chat for Minecraft

Simple Voice Chat is a plugin designed to enhance the communication experience on Minecraft servers. The plugin allows players to communicate with each other through voice chat, making gameplay more interactive and fun. In this article, we will discuss the features of Simple Voice Chat and how it can improve your Minecraft server.
Features of Simple Voice Chat:
Real-time voice communication: Simple Voice Chat allows players to talk to each other in real-time. This feature is especially useful for players who are collaborating on a project or are exploring a world together. Players can communicate quickly and efficiently, making their gameplay experience more enjoyable.
Distance-based volume: Simple Voice Chat has a distance-based volume feature that adjusts the volume of the voice chat based on the distance between players. This means that if players are far away from each other, their voices will be quieter, and if they are close, their voices will be louder. This feature adds a level of realism to the gameplay, making it more immersive.
Easy setup: Simple Voice Chat is easy to set up and requires no complicated configuration. Players can simply install the plugin, and they are ready to start communicating with each other. This feature makes it accessible for players of all levels of technical ability.
Customizable settings: Simple Voice Chat has customizable settings that allow server owners to adjust the plugin to fit their server's specific needs. For example, they can adjust the maximum distance at which players can hear each other, the volume of the voice chat, and more.
Simple Voice Chat is a valuable plugin that can enhance the communication experience on your Minecraft server. It is easy to set up, customizable, and can improve teamwork, community interaction, and the overall gameplay experience. By installing Simple Voice Chat on your server, you can create a more engaging and fun Minecraft world for you and your players.
Download Simple Voice Chat Plugin
Depending on your server, you will need to download the plugin, or the mod file.
If you are using a Vanilla server, you will need to switch your version to PaperMC or Spigot to be able to use plugins, you can do this on your first panel page.
Download the plugin from curseforge
1. Click on Forge if your server is using Mods, or Bukkit/Spigot/Paper for plugins.
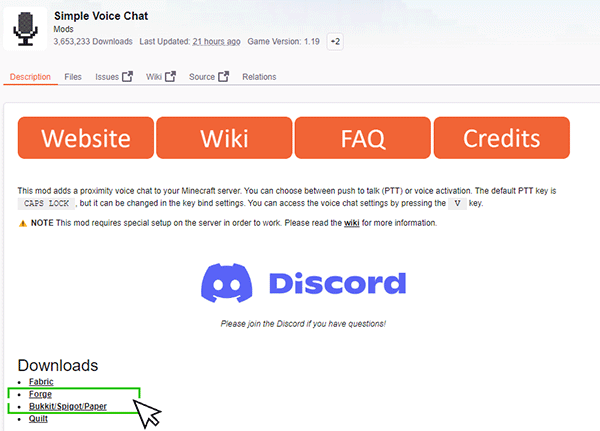
2. Then click on the version compatible with your server, here the 1.19, to download the voicechat .jar file to your computer.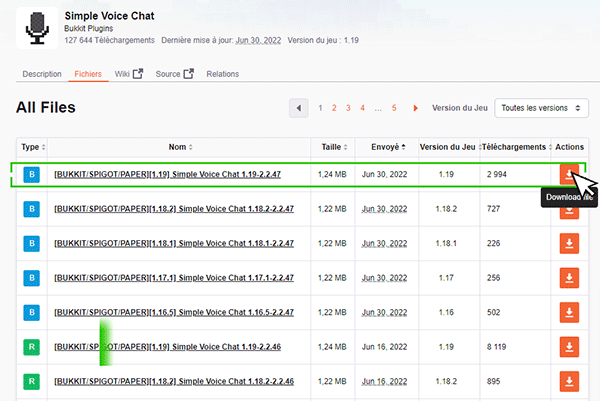
Upload Simple Voice Chat to your server
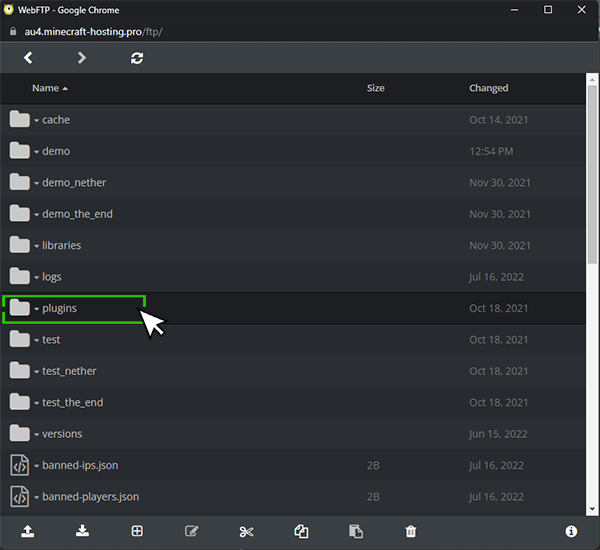
1. Now, you need to upload this file to your server, you can use the webftp for that.
Open the webftp from your panel.

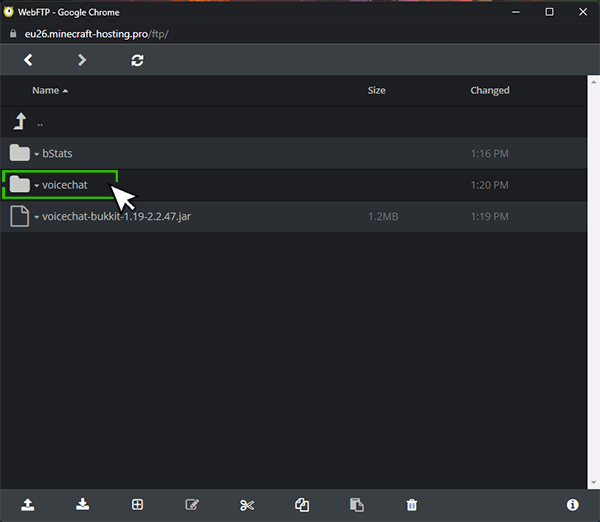
2. Select the plugins directory (or mods directory if you are using Forge), if you don't see any plugins or mods directory, start your server first, this will automatically create the folder.
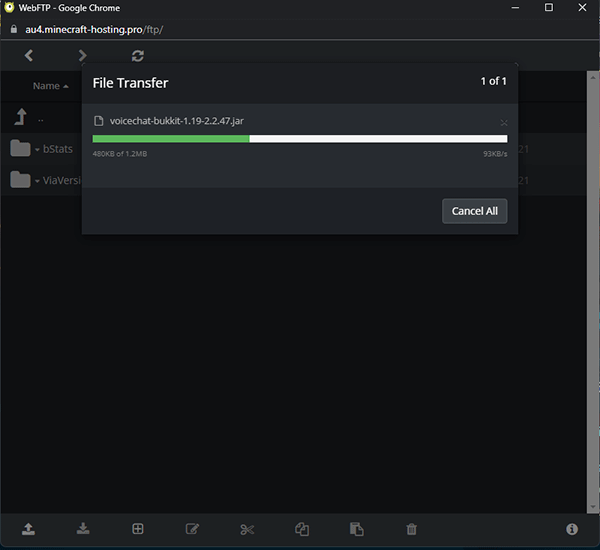
3. click on the bottom left arrow, or drag and drop the voicechat .jar file that you previously downloaded to upload it on your server.
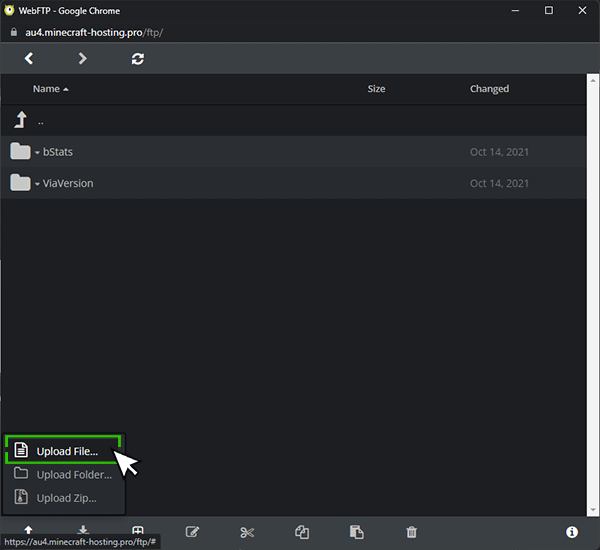
4. Wait the upload of the file.
5. Now you can restart your server.
Configure Simple Voice Chat Port as a Plugin
1. The voice chat is installed on your server, you need to configure it.
Navigate on your webftp, to the plugins/voicechat folder.
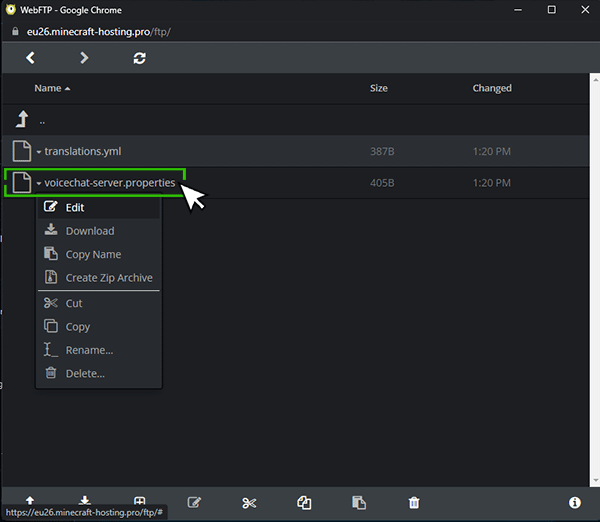
2. Select the voicechat-server.properties, and click Edit
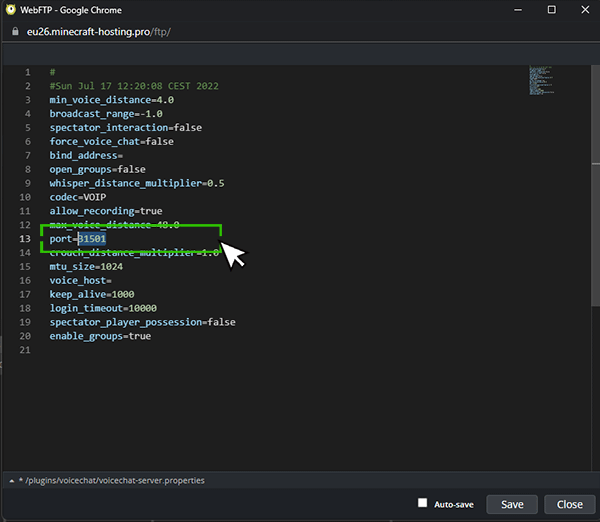
3. You must change the port used by your voicechat.
The ports 31000 to 32500 are open on Minecraft Hosting for plugins/mods.
Chose one of them, by exemple here 31501 (you can use 31XXX and the last 3 digit of your server port).
Click on Save to write the config, and you can close the webftp.
4. Do not forget to restart your server to apply the changes.
Your server is now configured to support the voicechat.
To use the voicechat ingame, simply press Keys "Caps-Lock" to speak,
or "M" to mute, "V" for generals settings, "G" to manage groups
Configure Simple Voice Chat Port as a mod (Forge version)
If running Forge, the config files are not at the same place, you have to :
1. Navigate to /<YOUR_WORLD_NAME>/serverconfig.
2. Edit the file named voicechat-server.toml
3. As for the plugin above, change the port to a ports between 31000 and 32500.
4. Save and restart your server to apply.
For more :
Simple Voice Chat discord
Get Started with a
Minecraft Server
Looking to create your own minecraft server? It only takes a few minutes.