
Minecraft Modpacks list
currently available on one click install
Stacia 2 Expert
1.19.2 1.4.8A demanding expert modpack with deep technological and magical progression.
Create Ultimate Selection Create Quests Create Addons 1.20.1
1.20.1 22.0.0The ultimate selection of Create mods and addons for 1.20.1.
FTB Unstable 6
26.1.2 1.6.1Guns Cars And Morph
1.20.1 2.0.7Drive, shoot and transform in this intense action modpack.
Dread A Horror Survival Pack
1.19.2 3.1.0A horrific survival pack in an oppressive world full of deadly dangers.
All Of Create Aeronautics
1.21.1 1.9Horrorland 2 Psychological And Classic Horror Modpack With Horror Quests
1.21.1 15.1.0Dive into psychological and classic horror with terrifying quests that test your nerves.
Techopolis 3
1.21.1 12.0Build a technological megacity with machines, automation and industrial challenges.
Create Ultimate Selection 2 Create Aeronautics Create Addons Aeronautics Addons
1.21.1 9.6.0YogCraft Modpack
1.4.7 1.0.0The legendary Yogscast modpack, revisited for nostalgic players of the 1.4.7 era.
FTB Vanilla
1.7.10 1.1.1A pure Minecraft experience on 1.7.10 without additional mods, ideal as a base.
FTB Unstable 1.21
1.21 1.3.0A test modpack integrating the latest mods in development for 1.21.
FTB Unstable 1.20 Forge
1.20.1 1.5.0Test the most recent Forge mods on 1.20.1 before they are stabilized.
FTB Unstable 1.20 Fabric
1.20.1 1.3.0FTB Unstable 1.16
1.16.3 1.2.1FTB Unstable 1.14
1.14.4 1.11.0An experimental modpack grouping mods being ported to 1.14.4.
FTB Unstable 1.12
1.12.1 2.0.4FTB Unstable 6
26.1.2 1.6.1FTB University 1.19
1.19.2 1.5.1Learn the basics of Minecraft modding with integrated tutorials and guided quests.
FTB University 1.16
1.16.5 1.9.0A pedagogical introduction to mods with progressive learning quests.
FTB University 1.12
1.12.2 1.2.1The FTB educational pack to discover Forge mods on 1.12.2.
FTB Ultimate Reloaded
1.12.2 1.11.0The revival of the legendary FTB Ultimate modpack on Minecraft 1.12.2.


FTB Ultimate Anniversary Edition
1.16.5 1.4.0A special anniversary edition of the classic FTB Ultimate on 1.16.5.


FTB Ultimate
1.4.7 1.1.2The original and iconic Feed The Beast modpack that defined a generation of players.
FTB Trident
1.7.10 1.4.0An adventure and exploration modpack for Minecraft 1.7.10 with rich content.
FTB Tech World 2
1.6.4 1.1.6Dive into advanced technology with automation and industrial machines.
FTB StoneBlock 4
1.21.1 1.14.2Survive, craft and prosper in a world entirely made of stone.
FTB StoneBlock 3
1.18.2 1.11.5The third iteration of the famous underground challenge with new mods.
FTB Presents Stoneblock 2
1.12.2 1.23.1Even more content in this stone world with technology and magic.


FTB SkyFactory Challenges
1.10.2 1.1.1Additional SkyFactory challenges for advanced players.
FTB Presents Skyfactory 2.5
1.7.10 2.5.8The classic version of SkyFactory, founder of the modded skyblock genre.
FTB Presents Skyfactory 3
1.10.2 3.0.21Craft your island from scratch with magic trees and infinite resources.


FTB Sky Odyssey
1.12.2 1.5.2An odyssey in the skies with islands to explore and varied skyblock challenges.


FTB Sky Adventures
1.12.2 1.5.1Aerial adventures with quests and floating islands to conquer.


FTB Skies Expert
1.19.2 1.13.0The expert version of FTB Skies, for players seeking an intense challenge.
FTB Skies 2
1.21.1 1.18.0More content, quests and challenges in the clouds.
FTB Skies
1.19.2 1.9.0Explore a universe of floating islands with guided progression and rich quests.
FTB Revelation
1.12.2 3.7.0An all-in-one modpack on 1.12.2 with magic, technology and exploration combined.


FTB Resurrection
1.7.10 1.0.1A collection of classic mods brought back to life for Minecraft 1.7.10.
FTB Pyramid Reborn 3.0
1.12.2 3.2.0Survive and progress inside a pyramid with guided quests.

FTB Plexiglass Mountain
1.18.2 1.2.4A unique adventure in a world of glass and crystals on 1.18.2.

Pax Prime 2015 Map
1.7.10 1.0.5The official map presented by FTB at PAX Prime 2015.
FTB One
1.19.2 2.10.0A unique and curated modpack offering a unified and balanced experience.

FTB Omnia
1.15.2 1.7.2A varied modpack mixing the best technology and exploration mods.


FTB OceanBlock 2
1.21.1 1.18.1Survive on an ocean platform and explore the modded ocean depths.
FTB OceanBlock
1.16.5 1.16.1An island in the middle of the ocean build, explore and master the waters.


FTB NeoTech
1.20.4 1.11.2A modern technological adventure with cutting-edge machines and automation.
FTB Monster
1.6.4 1.1.2A massive modpack bringing together dozens of mods for a complete experience.
FTB Magic World 2
1.6.4 1.1.2Dive into a world of pure magic with spells, rituals and magical dimensions.
FTB Mage Quest
1.7.10 1.2.0Become a powerful mage by mastering many different magic systems.

FTB Lite 3
1.7.10 1.5.1A light and accessible modpack to get started with modding without being overwhelmed.
FTB Lite 2
1.6.4 1.1.10A gentle introduction to Forge mods with a limited and well-thought-out selection.
FTB Legend Of The Eyes
1.19.2 1.9.0FTB Inventions
1.7.10 1.0.2A modpack centered on ingenuity, machines and creative constructions.
FTB Interactions Remastered
1.12.2 1.18.0The reworked version of the expert Interactions modpack on 1.12.2.
FTB Interactions
1.12.2 2.12.2A demanding expert modpack with a very in-depth technological progression.


FTB Presents Integration By Parts DX
1.16.5 1.13.3An advanced technology and systems integration modpack.
FTB Infinity Lite 1.10
1.10.2 1.8.0FTB Infinity Evolved Skyblock
1.7.10 2.0.1All the richness of Infinity Evolved in a skyblock format.
FTB Infinity Evolved 1.7
1.7.10 3.1.0The absolute reference modpack on 1.7.10 with magic and technology.


FTB Inferno
1.18.2 1.12.0An intense and difficult modpack plunging into a hell of technical challenges.


FTB Horizons III
1.12.2 1.10.0The third edition of the exploration modpack with new horizons to discover.
FTB Horizons Daybreaker
1.7.10 1.2.0Explore a world at the dawn of a new era with varied mods.
FTB Horizons
1.6.4 2.1.1The original FTB exploration modpack discover new biomes and dimensions.
FTB Presents HermitPack
1.10.2 1.7.0The official Hermits modpack for their season on 1.10.2.
FTB Genesis
1.19.2 1.9.1A narrative progression modpack with an immersive story and quests.
FTB Presents F.A.M
1.19.2 1.3.0A family-friendly and accessible modpack to play with loved ones.
FTB Evolution
1.21.1 1.35.0Evolve your civilization from the stone age to advanced technologies.
FTB Endeavour
1.16.5 1.9.0An adventure and discovery modpack with exploration and epic quests.


FTB Egg Hunt
1.12.2 1.1.0Go on an egg hunt in this fun and festive modpack on 1.12.2.
FTB Presents Direwolf20 1.6.4
1.6.4 1.0.23The emblematic modpack by creator Direwolf20 on version 1.6.4.
Direwolf20 1.4.7
1.4.7 5.3.2The original Direwolf20 modpack, a pioneer of modding.
FTB Presents Direwolf20 1.21
1.21.1 1.18.1The latest iteration of the Direwolf20 modpack on 1.21.1.

FTB Presents Direwolf20 1.20
1.20.1 1.16.1Direwolf20's carefully curated mod selection for Minecraft 1.20.1.
FTB Presents Direwolf20 1.19
1.19.2 1.13.1Explore and automate with Direwolf20's mod selection.
FTB Presents Direwolf20 1.18
1.18.2 1.11.0Technology and exploration with Direwolf20's curation on 1.18.2.


FTB Presents Direwolf20 1.16
1.16.5 1.13.2Direwolf20's balanced selection for Minecraft 1.16.5.
FTB Presents Direwolf20 1.12
1.12.2 2.9.1Direwolf20's reference modpack on version 1.12.2.
FTB Presents Direwolf20 1.10
1.10.2 1.13.0Automate and explore with Direwolf20's selection on 1.10.2.
FTB Presents Direwolf20
1.7.10 1.10.0The original and legendary Direwolf20 modpack on Minecraft 1.7.10.
FTB Departed
1.7.10 1.4.0A mysterious modpack with narrative progression and unprecedented dimensions.
FTB Presents Crackpack
1.7.10 1.1.0A chaotic and fun modpack with unpredictable and explosive mods.
FTB Cotton
1.16.5 1.1.0A light and modern Fabric modpack for a clean experience on 1.16.5.
FTB Continuum
1.12.2 1.7.0A demanding expert modpack with a very long and detailed technological progression.


FTB Presents Cloud 9
1.7.10 1.3.0Float in the clouds in this aerial and whimsical modpack.
FTB Chocolate
1.18.2 1.1.0FTB Builders Paradise 2
1.20.1 1.4.0A paradise for builders with advanced building tools on 1.20.1.
FTB Builders Paradise
1.12.2 1.9.0A paradise for creators with exceptional building mods.

FTB Beyond
1.10.2 1.11.0Go beyond the limits with this complete modpack mixing all genres.
FTB Arcanum Institute
1.18.2 1.4.0Learn the mystical arts in this institution dedicated to magic.
FTB Academy 1.16
1.16.5 1.4.1Learn the basics of Forge mods with integrated tutorials on 1.16.5.
FTB Academy 1.12
1.12.2 1.4.1The FTB educational modpack to master mods on Minecraft 1.12.2.

FTB Presents AbePack
1.19.2 1.6.1AbePlays' modpack a balanced adventure between exploration and technology.
Mustard Virus By Forge Labs
1.12.2 2.1Survive a slow but inevitable zombie invasion.


Winter Zombies By Forge Labs
1.12.2 1.2Face fast and relentless zombies in the snow.
Zombie Apocalypse
1.7.10 1.4.17Survive in a world overrun by the undead with limited resources.
Zeefski Jujutsu Kaisen Craft
1.20.1 3.0.1Master Jujutsu Kaisen techniques directly inside Minecraft.
Ultimate Lucky Oneblock
1.20.2 1.0A oneblock filled with lucky block surprises at every stage.
Wynncraft Plus
1.21.4 1.71Enhances the famous Wynncraft MMORPG server experience with complementary mods.
World Of Dragons
1.12.2 24.10.304A world populated by powerful dragons to fight, tame and ride.


Volcano Block
1.12.2 1.1.11Survive on a hostile volcanic island and tame lava in this fiery skyblock.
Voids Wrath 2
1.12.2 1.0.0Face the wrath of the void in this intense and chaotic adventure modpack.
Verdant Idea
1.20.1 0.9.1A nature-centered experience focused on ecology and harmonious living.
Vault Hunters Third Edition Remastered
1.18.2 1.0.1Vault Hunters Official Modpack Second Edition
1.16.5 1.13.9Dive into legendary vaults to obtain equipment and powers.

Vault Hunters Third Edition
1.18.2 3.21.5The definitive version of the legendary vault-hunting modpack.
Valhelsia 6
1.20.1 6.2.3Exploration and adventure in a world enriched with unique biomes, structures and creatures.


Valhelsia 5
1.19.2 5.3.0A vanilla+ adventure with well-selected exploration and building mods.
Valhelsia 2
1.15.2 2.3.4The second version of the Valhelsia exploration and building modpack.


Valhelsia 1
1.14.4 1.2.2The original Valhelsia modpack, centered on exploration and construction.


Esmp Unofficial Epic SMP Modpack
1.18.2 4.0Recreate the famous Epic SMP server experience with its iconic mods.
UniversIO
1.19.2 5.3An expert technology modpack with complex recipes and deep progression.


Underdog
1.12.2 3.8.0Start from nothing in this demanding survival modpack where every resource counts.
Ultimate Progression Sky
1.16.5 1.2.7Power up from the skies in this progression skyblock.


Ultimate Progression
1.16.5 1.2.7An epic power climb with well-structured progression stages.


Ultimate Origins Modpack
1.20.1 3.3Choose your origin and live a unique adventure based on your special abilities.

Towards Rocket Science
1.12.2 2.7.7Build rockets and explore space in this scientific modpack.
TortillaLand 2 Unofficial
1.21.1 19.1.0Relive the adventures of El Rubius's famous Spanish server.


TolkienCraft III Return To Middleearth
1.12.2 2.0.53Return to Middle-earth in this modpack inspired by Tolkien's work.

TNP Limitless 8 LL8
1.21.1 1.56.0A limitless modpack with guided progression and a carefully balanced mod selection.
TNP Limitless 7 LL7
1.20.1 1.21.0The seventh season of the limitless modpack with complete progression.


Timeless And Classics Guns More
1.18.2 1.0Realistic and stylish firearms for modern combat.
The Vanilla Experience TVE
26.1.1 7.34Enrich vanilla Minecraft with discreet and well-integrated mods.


Pixelmon Plus The Top Pixelmon Experience
1.16.5 1.03The best Pixelmon experience with carefully chosen complementary mods.
The Pixelmon Modpack
1.21.1 9.3.9Catch and train Pokémon in Minecraft with the official Pixelmon mod.
The Pioneers
1.20.1 8.2Become a pioneer and explore a vast and unknown world full of discoveries.


The Mimicer Experience
1.19.2A mysterious adventure where appearances are deceiving and danger is omnipresent.
The Fungal Infection CoOp Base Defense
1.20.1 2.1.0Defend your base against a fungal infection in co-op mode.
The Fog A Horror Experience
1.19.2A horror atmospheric experience where the fog hides invisible threats.
The Endless Frontier
1.15.2 6.3Explore an endless frontier with varied adventure and exploration mods.
The Dwellers We Fear
1.19.2 1.14Face nightmare creatures from the darkest depths.
The Ancient Dawn Prehistoric Journey
1.20.1 5.6A prehistoric journey with dinosaurs, fossils and ancient civilizations.
The 1.12.2 Pack Perfectly Complex
1.12.2 1.6.6A perfectly balanced collection of mods on 1.12.2.


Terralux
1.18.1 1.1.2Explore a lush Earth enriched with dense biomes and varied fauna.
TerraFirmaGregModern
1.20.1 0.12.7The demanding fusion of TerraFirmaCraft and GregTech in a modern version.
HardRock TerraFirmaCraft 3 Extreme Survival Hardcore Realistic
1.18.2 1.5.5Extreme realistic survival with geology, farming and primitive crafting.
Tekkit Classic Reloaded
1.19.2 1.3.1The legendary Tekkit modpack brought up to date.

TechRevolution
1.19.2 1.4.8Revolutionize your world with industrial machines and advanced automation.


Techopolis 3
1.21.1 12.0Build a technological megacity with machines, automation and industrial challenges.
Techopolis 2
1.19.2 8.1The second season of the advanced technological city-building modpack.
Tacz Expanded V10
1.20.1An extended collection of modern firearms for ultra-realistic combat.
Superior Rpg
1.20.1 1.8An RPG modpack claiming epic progression and absolutely massive content.
EMC SubTerra Tech
1.20.1 8.9Strictly Medieval Forge 2
1.18.2 v21A strict medieval experience with no modern technology, 100% authentic.


Strictly Medieval Forge
1.16.5 v43Live the Middle Ages without compromise in this fully medieval modpack.
Stoneopolis
1.20.1 4.2Build an entire city from stone in this builder modpack.

StoneBlock
1.12.2 1.0.37The classic of the genre survive and prosper in an all-stone world.

Stone Technology Ultimate
1.18.2 1.5.0Master technology starting from raw stone all the way to advanced machines.

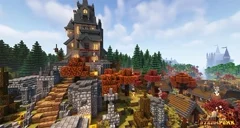
SteamPunk LPS
1.20.1 v19Dive into a steampunk universe with steam machines and Victorian aesthetics.


StaTech Industry
1.19.2 1.1.15Build a thriving industry with statistics and advanced machines.


Star Technology
1.20.1 8161044A galactic technological adventure with stellar machines and resources.
Stacia 2 Expert
1.19.2 1.4.8A demanding expert modpack with deep technological and magical progression.
Space Astronomy 2
1.10.2 1.5.9.1Explore the cosmos, build rockets and colonize distant planets.


Space Astronomy
1.7.10 1.7.7The original space modpack conquer space from within Minecraft.
Soulrend Dark Fantasy RPG Soulslike
1.20.1 8.1.1A dark fantasy soulslike modpack with fearsome bosses and a gothic atmosphere.
Solo Leveling Shadows
1.20.1 1.1.3Develop superhuman abilities inspired by Solo Leveling.
Solo Leveling Reawakening
1.20.1 1.7.2The hunter's awakening with even more devastating powers.
Solo Leveling Level Up
1.20.1 1.2.6Level up quickly and become the most powerful hunter.
Society Sunlit Valley
1.20.1 4.0.9Build and manage a thriving society in a peaceful sunny valley.
Society Sunlit Cobblemon
1.20.1 1.0.7-ssv4.0.8Slightly Flavoured
1.21.5 0.1.0A light touch of extra flavor with mods that subtly improve the experience.


Skyward Colonies Explore The Skies With Eureka And Create
1.20.1 2.2Explore the skies with Eureka and Create in this aerial colonies modpack.
Skyopolis 5
1.18.2 4.2Build a metropolis in the skies with progressive skyblock challenges.
SkyFactory One
1.16.5 1.0.7The simplified and accessible version of SkyFactory on Minecraft 1.16.5.


SkyFactory 5
1.20.1 5.0.8The fifth iteration of the iconic skyblock modpack with renewed mechanics.
SkyFactory 4
1.12.2 4.2.4Craft your island from the starter tree with advanced technologies.
Sky Alchemy
1.18.2 2.5.1Master alchemy from the skies in this magical and mysterious skyblock modpack.
Sky Of Grind
1.20.1 1.5A difficult skyblock where every resource is earned through perseverance.
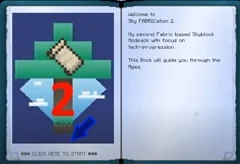
Sky Fabrication 2
1.17.1 1.1.4Fabricate your resources from the sky in this Fabric skyblock modpack.

Sky Bees 2
1.16.5 1.4.1Raise magical bees to generate resources in this apiary skyblock.


Sky Bees
1.16.5 3.4.6A skyblock centered on beekeeping with bees producing all resources.


Simply Shaders
1.19.3 1.3.4Easily install and enjoy beautiful shaders to enhance Minecraft visuals.
Shattered Ring
1.20.1 2.0A shattered ring, a fractured world an epic RPG adventure to piece together.
SevTech Ages Of The Sky
1.12.2 3.2.3Progress through the ages of humanity in a skyblock format.


SevTech Ages
1.12.2 3.2.3Progress through the ages from flint to the most advanced technologies.


Seaopolis Submerged
1.20.1 4.0Build an underwater city and explore the oceans with marine mods.


Seablock Rustic Waters
1.12.2 1.3.9Survive on water and transform mud into precious resources.
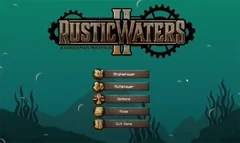
Rustic Waters II
1.16.5 1.16A rustic aquatic adventure with exploration and crafting on 1.16.5.


Roguelike Adventures And Dungeons 2
1.16.5 1.17Procedural dungeons, epic bosses and legendary loot on 1.16.5.


Roguelike Adventures And Dungeons
1.12.2 1.56Explore infinite dungeons and face fearsome bosses.


RLCraft Dregora
1.12.2 1.1.2RLCraft with Dregora world generation for even more breathtaking landscapes.


RLCraft
1.12.2 2.9.3The hardest survival modpack, where every death teaches you a precious lesson.


Reminiscence
1.20.1 1.4.5A nostalgic journey in a world enriched with memories and gentle atmospheres.
Regrowth
1.7.10 1.0.2Restore a dead and barren world by gradually bringing it back to life.


Reclamation Reclaim The World
1.20.1 2.3.2Reclaim a devastated world and rebuild civilization from scratch.
Rebirth Of The Night RotN
1.12.2 3.3.4A terrifying night survival with deadly nights and hordes.


RAM Really Awesome Mods
1.15.2 0.4.4A collection of truly awesome mods to enrich your experience.

Raspberry Flavoured
1.19.2 3.2.1A light and modern Fabric flavor with well-chosen vanilla+ mods.
Ragnamod VII In The Sky
1.18.2 7.1.10Ragnamod VII
1.18.2 7.2.1The seventh season of the epic modpack combining magic, technology and adventure.
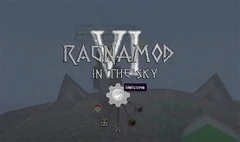
Ragnamod VI In The Sky
1.16.5 6.0.4The sixth Ragnamod in a skyblock format for an intense aerial challenge.
Ragnamod VI
1.16.5 6.1.10A massive adventure combining epic quests, magic and advanced technology.


Ragnamod V
1.12.2 5.10.6The fifth iteration of the Ragnamod modpack with ever richer content.
Ragnamod IV
1.12.2 3.5.1Technology, magic and exploration in the fourth Ragnamod installment.


RogueLite Adventures And Dungeons
1.12.2 1.54A lightweight version of RAD to discover dungeons.


Qsmp Experience Unofficial
1.18.2Recreate the famous QSMP server experience by Quackity.


Psychocraft Horror
1.19.2 2.0A descent into madness with intense psychological horror levels.
Prominence II Hasturian Era
1.20.1 3.9.27New quests, formidable bosses and RPG mechanics in the Hasturian era.

Project Ozone 3 A New Way Forward
1.12.2 3.4.11Three difficulty modes in this expert and complete skyblock modpack.

Project Overpowered Skyblock
1.12.2 5.0Become extremely powerful in this skyblock with excessive abilities.
Project Nope Zone
1.18.2 1.2.1A horror and survival modpack where every zone hides a deadly danger.
Project Infinity 0.1
1.20.1 0.0.49.3An ambitious modpack harmoniously blending magic, technology and exploration.
Project Architect 2
1.20.1 6.0Become the ultimate architect with advanced building tools and challenges.


Prodigium Reforged
1.20.1 4.2.042A Terraria-inspired experience with bosses, biomes and RPG progression.
Prison Escape Beginnings
1.21.1 0.55Escape from prison in this narrative and creative modpack.
Prey An Expansive RPG Nightmare Modpack
1.19.2 1.14An expansive RPG nightmare with predators, survival and an oppressive atmosphere.


Prehistoric World Dinosaurs Adventure Quests NEW Prehistory Update
1.20.1 87.3.0Explore a prehistoric world populated by dinosaurs with quests and fully recreated fauna.
Pokehaan Craft 2
1.16.5 2.16.2The sequel with even more Pokémon Pixelmon content.


Pokehaan Craft
1.12.2 1.4.1Catch Pokémon and progress in this well-structured Pixelmon modpack.

Plastek 2
1.20.1 1.35.1The sequel to the Plastek technology modpack with new machines and challenges.


Plastek
1.19.2 1.63A technology modpack with plastic machines and industrial progression.


Planeta Vegetta Unofficial
1.21.1 20.0.0Relive Vegetta777's adventures in this unofficial modpack.
Pixelmon Realms The Ultimate Pixelmon Experience
1.16.5 9.1.13The ultimate Pixelmon experience with realms, gyms and complete leagues.
Peace Of Mind
1.12.2 2.1.3A peaceful and relaxing experience to play without stress or intense danger.


Parasites By Forge Labs
1.12.2 1.0Survive a parasite invasion in this biological horror modpack.
Paradise Of Lucky Blocks
1.8.9 1.10.7A chaotic paradise filled with lucky blocks and infinite surprises.
Ozone Skyblock Reborn 2
1.21.1 1.5.4The Ozone skyblock reborn with even more content and challenges.
Ozone Skyblock Reborn
1.20.1 1.20A rebirth of the classic skyblock with modernized progression.


Create Overlord Aeronautics Update
1.21.1 2.02Over Stars
1.20.1 5.10Conquer the stars in this ambitious and epic space modpack.
Otherworld Dungeons Dragons
1.20.1 v8Experience a D&D campaign in Minecraft with narrative quests.
Origins SMP
1.20.1 2.0.0.1Choose your origin with unique abilities in this multiplayer modpack.

Origins SMP Fabric
1.21.1Play with special origins and unique abilities on Fabric.
Origins Adventure
1.18.1 3.5An RPG adventure with the origins system for unique powers.


Optimized Fps Neoforge
1.21.1 2.1.12Boost your performance with the best NeoForge optimization mods.
One Piece Craft
1.7.10 1.02Sail the Grand Line, eat Devil Fruits and become a legendary pirate.
Modded OneBlock
1.19.1 1.19The classic oneblock enriched with mods for a deeper experience.
One Block Horror
1.19.2 1.3The oneblock takes a horrifying turn with terrifying random events.
Omnifactory
1.12.2 1.3.2An expert modpack centered on GregTech with highly advanced industrial progression.

Odyssey Space A New Beginning
1.16.5 2.3.8Colonize space and build advanced planetary bases.


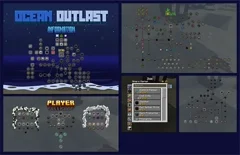
Ocean Outlast
1.12.2 v79Survive in the middle of the ocean in this intense aquatic survival modpack.
Ocean Depths Quests Ocean Mods
1.20.1 43.2.0Dive into the ocean depths with mods dedicated to the abyss.
OccultCraft
1.20.4 6.8Practice the occult, dark rituals and forbidden magic in Minecraft.

NotiFine
1.21.5 7.0An optimization modpack to improve performance and fluidity on 1.21.5.
Not Too Complicated 2
1.16.5 1.5.4An accessible modpack that doesn't take itself too seriously for everyone.
Not Too Complicated
1.12.2 1.5.6Simple but effective content without excessive complexity.


Nomifactory
1.12.2 1.2.2.1An improved fork of Omnifactory with even more refined GregTech progression.

Nomifactory CEu
1.12.2 1.7.7The Community Edition Updated version of Nomifactory, even more complete.
Nizcos Cobblemon Adventures 2
1.21.1A new Cobblemon adventure with more regions to explore.
Ninety Nine 99 Mods On The Wall Featuring Create
1.18.1 2.6.199 carefully selected mods built around the Create mod.

NightfallCraft The Casket Of Reveries
1.20.1 2.2.7.1A dark world where haunting mysteries and reveries blend with danger.
New Simple Mods Easy To Understand 1.21 Update
1.21.1 41.5.0An accessible and progressive introduction to Minecraft mods for beginners.
New Game 2 Enjoy An Adventure Without Limits
1.20.1 41.4.0A limitless adventure with free exploration and mods accessible to everyone.

Isle Of Berk Claws Of Berk
1.18.2 3.1.6Neo Adventure
1.21.1 1.1.4A new adventure in a world enriched with quests and fresh content.
Naruto Modpack All Mods Plus
1.7.10 1.1.2Become a ninja and master chakras inside Minecraft.
Mystical Block
1.16.5 2.7.3A mystical oneblock where magic governs every resource and progress.
Mystic Horizons
1.20.1 1.12An RPG with distant horizons, quests and magical powers.
Moonstrucks Rebirth A Better Cozy Experience
1.20.1 6.0.1A cosy and soothing rebirth with a gentle vibe and relaxing gameplay.


Monumental Experience In The Sky
1.20.1 1.0.249Build monuments in the air in this ambitious skyblock.
Monifactory
1.20.1 0.13.4A fork of Nomifactory with additional tweaks for a better experience.


Modified Cobblemon Plus
1.21.1 11.11.2Cobblemon enriched with many additional mods for more content.


Modern Skyblock 3 Departed
1.12.2 3.6.0An expert skyblock with complex recipes and intense progression.
ModCube
1.18.2 1.14A varied modpack with a selection of popular mods for a complete experience.

Cobblemon SMP RPG The 1 Cobblemon Experience
1.21.1 1.6.1The best Cobblemon experience with integrated MMORPG elements.
Mineshafts Monsters Lite
1.16.2 1.4A lighter version of the popular adventure and exploration modpack.
Mineshafts Monsters
1.16.2 1.11Explore dangerous mines and face terrifying monsters.


Minecraft VHS
1.19.2 1.6An 80s retro aesthetic with a glitchy VHS horror atmosphere.
Legendary Edition
1.20.1 2.15A legendary edition with epic mods and massive content.

FarmerCraft Farmers Life
1.16.5Become a farmer and manage your farm with realistic mechanics.
MC Eternal
1.12.2 1.6.2.3A massive all-in-one modpack with magic, technology and exploration on 1.12.2.

MineColonies Official
1.21.1 1.8Build and manage thriving colonies with hardworking settlers.
MineColonies Dimensional Adventure
1.21.1 1.2.1Manage colonies across multiple different dimensions.
MineColonies Create Conquer
1.20.1 3.4.3Build colonies with MineColonies and automate production with Create.
MIFoundation
1.19.2 1.5.0A technical and well-structured modpack with solid technology foundations.
Medieval MC Neoforge MMC5
1.21.1 v31Live the Middle Ages on NeoForge with rich medieval content.
Medieval MC Forge MMC4
1.20.1 v39Dive into a medieval era with quests, armor and castles.
Mechanical Mastery
1.18.2 1.5.0Master machines and automation in this technology modpack.
MeatballCraft Dimensional Ascension
1.12.2 0.18.5-hf2Ascend through dimensions in this massive expert modpack.


Mcsx Minecraft PS1 Edition
1.18.2 1.9.7Recreate the PlayStation 1 aesthetic with retro pixelated graphics.
MC Eternal Lite
1.12.2 1.3.8.1The lighter version of MC Eternal, accessible for less powerful machines.


MC Eternal 2
1.20.1 1.2.1.4The sequel to the massive MC Eternal modpack with even more mods and content.
Chocolate Edition Minecraft
1.19.2 1.9.1A sweet and whimsical experience with fantastical mods.


Modpack Meultis Backrooms
1.20.1 1.4Explore and survive in the anguishing Backrooms universe in Minecraft.
Mayview With Cobblemon
1.21.1 1.1.2A peaceful adventure in Mayview with Cobblemon Pokémon.
Marshys Secrets Of The Omnitrix Palladium Beta
1.12.2 4.55Become Ben 10 and transform into aliens inside Minecraft.
Manufactio 2 Nuclear Edition
1.12.2 1.01Master nuclear energy in this advanced industrial modpack.
Magiculture 2
1.12.2 0.9.1.0Combine magical agriculture and technology in this well-balanced hybrid modpack.

Magiculture
1.7.10 2.0.4Grow magical plants and master spells in this mystical agricultural modpack.
Lucky World Invasion
1.20.1 2.7.2The world is invaded by lucky blocks with unpredictable consequences.


Lucky Block Challenge
1.21.1 2.0.6Every block can be a blessing or a catastrophe pure unpredictability.
Lost World The Broken Script
1.21.1 3.5.0Explore a lost world whose very reality seems broken.
Linggango
1.20.1 5.8An adventure and exploration modpack with a varied and fun mod selection.
Liminal Industries
1.20.1 1.19.3Explore liminal industrial spaces in this strange and haunting atmosphere.
Lightweight Adventures With Team Rustic
1.16.5 1.10.0.0A light and rustic adventure modpack.
Life In The Village 4
1.20.1 0.6Life In The Village 3
1.19.2 2.10Live the peaceful village life in the third season of the modpack.


Life In The Village 2
1.16.5 1.38Grow your village and live an enriching rural life.
Life In The Village
1.12.2 1.25Build and animate your own village with life mechanics.

Levitated
1.12.2 1.5.3Everything floats explore an inverted gravitational surreal world.


Last Days Of Humanity
1.12.2 0.5.7The last days before the apocalypse survive in a dying world.


Lapitos Galacticraft
1.12.2 2.3.6.3Explore the solar system with Galacticraft and space mods.

KEO RPG Optimized
1.21.1 4.0.0KenCrafters Modpack
1.20.1 1.0A balanced mod selection from the KenCrafters community.

Karmaland 5 Unofficial
1.21.1 20.1.0Relive the adventures of AuronPlay's famous Spanish server.


Just Create SMP
1.21.1 0.5An SMP server centered exclusively on the Create mod and its addons.
Jurassic World Reborn II
1.20.1 1.0.3Tensura Journey Of Reincarnation
1.19.2 1.2.8Dive into the universe of Tensei Shitara Slime Datta Ken.
Isle Of Berk
1.18.2Live on the Isle of Berk and train dragons in the Dragons universe.
Into The Backrooms Found Footage Horror
1.20.1 1.3Explore the Backrooms in an anguishing found footage style.
Integrated MC
1.20.1 1.6.8Harmoniously merges technology and magic mods for a unified experience.
InsaneCraft Modpack
1.12.2 1.3.1.1A crazy and chaotic modpack with unpredictable and explosive mods.
Infinity Evolved Reloaded
1.12.2 4.3.7A reworked version of the classic Infinity Evolved on 1.12.2.
Industrial Village
1.20.1 1.11Transform a peaceful village into an automated and thriving industrial center.

Immersed With Shaders
1.21.5 5.3An immersive experience with beautiful shaders integrated from the start.
Ice And Fire Magic Modpack
1.16.4 0.1Face ice and fire dragons in this magical modpack.
HR New Beginnings 2
1.16.5 2.0.1A new start in an enriched world with varied survival mods.


HR New Beginnings
1.15.2 2.6.0Start over from zero in this survival modpack with guided progression.

Horrorland 2 Psychological And Classic Horror Modpack With Horror Quests
1.21.1 15.1.0Dive into psychological and classic horror with terrifying quests that test your nerves.
Horror Craft
1.12.2 1.11.5A pure horror experience with nightmarish creatures and jumpscares.


Homestead A Cozy Survival Experience
1.20.1 1.3.7Holycube Revolution
1.21.1 1.1.0The modpack of the famous French Holycube server in its revolutionary version.
Hexxit Updated
1.12.2 1.0.2The legendary adventure and exploration modpack updated for 1.12.2.


Haven Veni De Nova
1.20.1 3.0.1Find shelter and build a haven of peace in a renewed world.
Haven CaveBlock
1.19.2 1.4.0A soothing caveblock where you build your refuge in the depths.
HardRock TerraFirmaCraft 4 Realistic Extreme Survival Hardcore
1.20.1 0.2.8Hardcore ultra-realistic survival with extreme primitive mechanics.
Guns N Dragons
1.18.2Face dragons with firearms in this explosive action mix.
Guns Cars And Morph
1.20.1 2.0.7Drive, shoot and transform in this intense action modpack.
The Last War TaCZ Guns And Adventure Survivors World With TaCZ Guns Quests Update
1.20.1 53.2.0A post-apocalyptic world with firearms, epic quests and intense combat.
GT New Horizons
1.7.10 2.8.4The ultimate GregTech expert modpack hundreds of hours of intense progression.


GregBlock
1.12.2 2.2.0The GregTech challenge in a StoneBlock format for technology experts.
Greed The Resource 4 Infinity
1.16.5 7.1Accumulate infinite resources in this progression modpack.


Glacial Awakening
1.12.2 1.2.3Awaken in a glacial world and survive the intense cold.
Ghostscape Legends
1.20.1 1.5.2Explore a world haunted by ghosts and terrifying legends.


From The Fog Reimagined
1.20.1 6.0Slender Man lurks in the fog in this deeply unsettling atmospheric horror modpack.
Fresh Smooth
1.21.1 1.0.0A fresh and clean experience with visual mods and quality of life improvements.
Forever Stranded
1.10.2 2.0.9Stranded in a hostile desert survive the heat and thirst.


Forever Factory
1.19.2 2.0.3From Magic To Tech
1.21.1 3.2.9.32Progress from primitive magic to advanced technology, step by step.


Fight Or Blight
1.19.2 0.4.8Fight a growing corruption threatening to destroy the entire world.
Fear Nightfall Remains Of Chaos
1.20.1 1.1.4Survive the chaotic and terrifying nights of this broken world.


Farming Valley
1.10.2 1.3.4Live the peaceful life of a farmer, cultivate your lands and build your valley.

Farming Crossing 5 Made To Order
1.21.1 2.1.5The fifth season of the made-to-order farming modpack.
Farming Crossing 4
1.20.1 4.1.13Cultivate, raise livestock and manage your farm in this fourth farming season.
Fantasy Realm
1.18.2 v3A fantastic kingdom to explore with magical creatures and epic quests.


Fantasy MC Fabric
1.21.1 0.3.1Live a fantastic adventure on Fabric with magical exploration mods.


Fabulously Optimized
1.21.4 8.0.1The most popular Fabric optimization modpack for maximum FPS.


Euphoric Curiosity
1.20.1 1.0A euphoric and curious exploration of a world rich in discoveries.


Essentials Mods Forge 1.21 Release
1.21.1 37.1.0The essential must-have mods to enrich Minecraft 1.21.
Enigmatica 9 Expert E9E
1.19.2 1.25.0The expert modpack from the Enigmatica series with very demanding progression.


Enigmatica 8 E8 1.18
1.18.2 2.5.1The eighth iteration of the Enigmatica series on Minecraft 1.18.2.

Enigmatica 6 Expert E6E
1.16.5 1.11.0The expert version of Enigmatica 6 for skilled and patient players.
Enigmatica 6 E6 1.16.5
1.16.5 1.11.0A complete and balanced modpack mixing magic, technology and adventure.

Enigmatica 2 Expert Skyblock E2ES
1.12.2 1.90Enigmatica 2 Expert in an ultra-demanding skyblock format.

Enigmatica 2 Expert E2E
1.12.2 1.92The expert version of Enigmatica 2 hundreds of hours of gameplay.

Enigmatica 2 E2
1.12.2 1.79The reference all-in-one modpack on 1.12.2 magic, tech and exploration.


Enhanced Horror Experience
1.20.1 3.0.3An enhanced horror experience with more fear and dread.
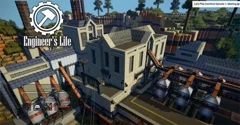
Engineers Life 2
1.16.5 1.18Become an accomplished engineer with advanced machines and constructions.
Engineers Life
1.12.2 2.05Live the life of an engineer with Immersive Engineering and realistic mechanics.


EMC To The Sky
1.16.5 5.2Dungeons Dragons And Space Shuttles 2
1.16.5 2.8From magic to space in this expert modpack for 1.16.5.
Dungeons Dragons And Space Shuttles
1.12.2 8.0From medieval magic to space shuttles on 1.12.2.

Kingdoms And Colonies 7
1.20.1Manage kingdoms, build colonies and explore dungeons.
Dungeon Heroes RPG Series
1.21.1 2.5.1Become a legendary hero by conquering procedural dungeons.


Dreamcraft Forge
1.19.2A waking dream explore an oneiric world with varied mods.


Dread A Horror Survival Pack
1.19.2 3.1.0A horrific survival pack in an oppressive world full of deadly dangers.


Dragon Survival Dragoncraft
1.21.1 23.0.0Become a true dragon and master the skies of Minecraft.
Dragon Craft Super
1.7.10 0.15.6Craft and fight with dragons in this action modpack on 1.7.10.


Divine Journey 2
1.12.2 2.23.4An expert divine progression modpack with very high difficulty.
Divine Journey
1.7.10 1.5.7A divine journey through magic and technology on Minecraft 1.7.10.


DigSite
1.12.2 1.0.29Archaeological excavations discover artifacts and buried civilizations.

Desolate Planet A Crash Landing Remake
1.20.1 1.8.5.1Crashed on a hostile planet survive in this faithful Crash Landing remake.
Demon Slayers Unleashed
1.16.5 1.6.2Master breathing styles and slay demons like in Kimetsu no Yaiba.
Definitely Not Tekkit
1.12.2 1.8A technology modpack inspired by Tekkit but definitely not Tekkit.
The Decursio Project Expert
1.16.5 1.0.9An expert modpack with a curse to lift and a long progression.


DeceasedCraft Urban Zombie Apocalypse
1.20.1 5.10.16Survive in a devastated city overrun by the undead.


Dragon Ball Zeef
1.7.10 2.4Become a Super Saiyan and face powerful enemies inside Minecraft.
DawnCraft Echoes Of Legends
1.18.2 2.0.16A complete RPG with combat, legendary bosses and epic quests.


DarkRPG RPG With Vampires Dragons Magic Quests Adventure
1.20.1 2.8.0Vampires, dragons, dark magic and adventure quests in a complete RPG modpack.


DarkRPG RPG With Magic Origins Quests Adventure
1.20.1 8.9.3Cute Craft
1.20.1 2.3.2Make Minecraft adorable with kawaii mods, cute creatures and bright colors.
Cursed Walking A Modern Zombie Apocalypse
1.20.1 3.1.1A modern zombie apocalypse with relentless hordes and tense survival.


Cuboid Outpost
1.16.5 1.1.2Build a cubic outpost and defend it in this hostile environment.

Cryptopolis
1.19.2 4.3A cryptic city with secrets to uncover and mysteries to solve.

Crundee Craft
1.7.10 1.1.6The legendary modpack by CaptainSparklez and SSundee brought up to date.
Crucial 2 The Refresh Update
1.16.5 1.5The crucial mods updated for a fresh experience.

Creepy Scary RPG
1.19.2 1.3A creepy RPG with nightmarish creatures and a dark atmosphere.


Create Ultimate Selection 2 Create Aeronautics Create Addons Aeronautics Addons
1.21.1 9.6.0Create Ultimate Selection Create Quests Create Addons 1.20.1
1.20.1 22.0.0The ultimate selection of Create mods and addons for 1.20.1.
Create Stranded At Sea
1.21.1 3.1.0Stranded at sea build a steamboat and sail toward survival.
Create Stellar
1.19.2 1.2.3Combine Create's mechanics with a stellar and space adventure.
Create Perfect World
1.20.1 1.0Build the perfect world through Create's ingenious mechanics.
Create Mekanized
1.19.2 1.6.3Merge Create and Mekanism for a formidably advanced industrial experience.

Create Chronicles The Endventure
1.21.1 2.0.0Create Chronicles Bosses And Beyond
1.20.1 2.5.3Master Create and face powerful bosses beyond.

Create Arcane Engineering
1.18.2 1.9.3Blend Create's engineering with arcane magic in a perfect balance.


Create Above And Beyond
1.16.5 1.3Rise and surpass your limits with Create in this expert modpack.
CrazyTown Season 3
1.21.1 0.2The third season of the chaotic and fun crazy town modpack.
Crazy Craft Updated Lite
1.16.5 0.1.6A lighter version of the famous chaotic Crazy Craft modpack.

Crazy Craft Updated
1.16.5 0.12.4The modern update of the legendary absolute madness modpack.
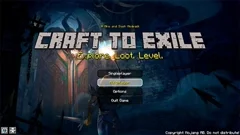
Craft To Exile Harmony
1.16.5 2.3.2A Path of Exile-inspired ARPG with random loot and varied builds.
Craft To Exile Dissonance
1.15.2 3.1.9The original ARPG Craft to Exile on 1.15.2 with loot and builds.

Craftoria 2 Worlds Beyond
26.1.2 0.8.0Craftoria
1.21.1 1.30.0Combines advanced crafting, industrial automation and exploration in a balanced modpack.

Craft To Exile 2 VR Support
1.20.1 1.1.3The sequel to the ARPG with VR support and new content.
Craft For Life Edition Enhanced RLCraft Experience
1.12.2 2.9.83An enhanced RLCraft experience for extreme survival enthusiasts.


Crackpack 3
1.12.2 3.0.11The third installment of the chaotic and explosive modpack, crazier than ever.

Crackers Wither Storm Performance
1.20.1 1.1.2Fight the Wither Storm with optimized performance.
Cottage Witch
1.19.2 1.17.7Live in your witch's cottage surrounded by plants, potions and magic.
Conquest Reforged Modpack Fabric
1.20.1 1.3.5Create breathtaking medieval constructions with this official Fabric pack.
Conquest Reforged
1.20.1 1.3.5Build detailed medieval structures with Conquest Reforged on Forge.
Concatenation
1.20.1 1.5.3A coherent linear progression where each step logically chains to the next.
Complex Gaming Pixelmon The 1 Pixelmon Experience
1.16.5The best Pixelmon experience from the famous Complex Gaming server.
Compact Claustrophobia
1.12.2 1.3.5.2Survive in confined spaces and progress despite the claustrophobia.


Cobbleverse Pokemon Adventure Cobblemon
1.21.1 1.7.31Explore a vast Pokémon universe with Cobblemon in this immersive adventure.
Cobblemon Star Academy Legacy
1.20.1 0.1.7Train at this star academy dedicated to Cobblemon breeding.
Cobblemon SMP
1.20.1 3.2.1Play with friends in this SMP server centered on Cobblemon adventure.
Cobblemon Realms
1.21.1 5.9.2Pokémon meets Minecraft in varied realms to explore.
Cobblemon Official Modpack NeoForge
1.21.1 1.7.3The official Cobblemon modpack on NeoForge for 1.21.1.
Cobblemon Official Modpack Fabric
1.21.1 1.7.3The official Cobblemon modpack on Fabric to live the Pokémon adventure.
Cobblemon Academy 2.0
1.21.1 2.3.0Train as a Pokémon trainer at a fully modded campus.
Cobblemon Academy Legacy
1.21.1 1.4.1The original version of the Cobblemon training academy.
Ciscos Fantasy Medieval RPG Dragonfyre
1.20.1 v3A medieval epic with legendary fire dragons.
Ciscos Fantasy Medieval RPG Lite
1.19.2 v16A lighter version of Cisco's medieval adventure.
Ciscos Fantasy Medieval RPG Ultimate
1.19.2 v8A complete and richly detailed fantasy medieval epic.


Chroma Technology 2
1.16.5 1.2.1The sequel to the colorful technology modpack with advanced machines.

Chroma Technology
1.12.2 1.4.3A colorful technology modpack with industrial progression.


Chroma Sky
1.12.2 1.1.1A colorful and technological skyblock with chromatic resources to master.
Chroma Endless
1.16.5 1.1.1Endless exploration in this colorful modpack with unlimited possibilities.


Chosens Modded Adventure
1.20.1 0.9.2Chosen Architect's modded adventure balanced and fun.


Chemical Exchange
1.12.2 1.14.1Master chemistry and molecular exchanges in this scientific modpack.


Chefs Adventure
1.20.1 1.0.4Cook, explore and become the best chef in Minecraft.
Caveopolis Modpack
1.20.1 5.0Build an underground metropolis in the depths of a cavernous world.

Cave Horror Project 2.0
1.19.2The second season of the underground horror project even scarier.
Cave Horror Project 1 Best Horror Modpack With Quests
1.20.1 3.3Explore cursed caverns in this claustrophobic horror modpack.
Cabin Create Above Beyond In Newer
1.20.1 2.1.5Create Above and Beyond reinvented in a newer version.
Create 2 Mekanism Sky Edition 2
1.20.1 0.9.9Create and Mekanism united in an advanced skyblock challenge.
Bun Souls
1.20.1 0.84A soulslike modpack with difficult combat, tough bosses and epic loot.
BTH Beyond The Horizon
1.20.1 1.12.2Go beyond the horizon in this great exploration adventure.
Breakneck Optimized FPS Boost Shaders QoL
1.21.4 4.4.2Boost your FPS with shaders and quality of life mods.
Brass
1.16.2 1.0.0An industrial steampunk modpack centered on brass and steam machines.


Boosted FPS Performance FG
1.20.1 1.2.1Optimize your Forge performance with the best optimization mods.
Boosted FPS Performance FB
1.21.5 1.5.4Maximize your FPS on Fabric with a selection of optimization mods.
BM Revelations II
1.20.1 2.3.0The second revelation with epic mods and complete progression.


Exosphere 1
1.20.1 2.0.9Explore the exosphere and the limits of the world in this space exploration modpack.


Bliss A Peacefullike Experience
1.18.2 1.2A peaceful and blissful experience to relax while playing.


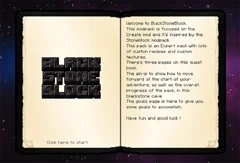
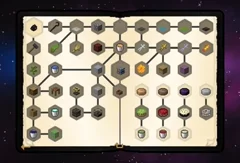
Blackstone Block
1.16.5 1.0.8A dark stone StoneBlock with a gothic atmosphere.

Biohazard Project Genesis The Ultimate Apocalypse
1.20.1 0.4.5Beyond Depth
1.20.1 12.5.4Dive beyond known depths in this underground exploration modpack.
Beyond Cosmo
1.20.1 1.7.0Explore beyond the cosmos with planets to conquer.
Beyond Ascension
1.20.1 1.9.2Ascend beyond your limits in this epic progression modpack.
Better MC Skyblock Bmcs
1.20.1 9.5The Better MC experience in a rich and well-balanced skyblock format.
Better MC Neoforge BMC5
1.21.1 v49Better MC on NeoForge with generous vanilla+ improvements.
Better MC Forge BMC4
1.20.1 57.5Enrich vanilla Minecraft with new biomes, creatures and structures.


Better MC Forge BMC1
1.16.5 v62The original Better MC Forge version for Minecraft 1.16.5.

Better MC Fabric BMC3
1.21.1 v45Enrich the Fabric vanilla experience with biomes and structures.


Better MC Fabric BMC1
1.19.2 v20The first Better MC on Fabric for 1.19.2.


Better Cobblemon Pokemon
1.21.1 1.6Cobblemon enhanced with many additional mods for the Pokémon adventure.
Better Adventures Fabric
1.20.1 1.45Improve your Fabric adventures with exploration and content mods.
Benchmark II 1.18
1.18.1 1.0.7Test and optimize the performance of your Minecraft installation.


BigChadGuys And The Holy Grail
1.19.2 1.0.1An epic quest for the Holy Grail in this adventure modpack.

BigChadGuys Plus W Cobblemon
1.20.1 2.15.0The BigChadGuys experience enriched with Cobblemon Pokémon adventure.


AMP Sky Of Diamonds
1.12.2 1.19.0A diamond skyblock with a brilliant and sparkling progression.

All The Mods 3 Lite Atm3l
1.12.2 3.2.0The lighter version of ATM3 for less powerful machines.
Ascendra
1.20.1 8.8Ascend to new heights in this RPG modpack with vertical progression.
Arcana Automata Sky Isles Odyssey
1.19.2 1.9Arcane magic and automation in this mystical sky islands odyssey.


Arcadia RPG
1.20.1 3.4.0Set off on an adventure in a rich RPG world with dungeons and legendary equipment.
Attack Of The BTeam Updated
1.12.2 1.0The chaotic modpack by Bajan Canadian updated.

All Of Create
1.21.1 1.9A modpack entirely centered on the Create mod and its machine mechanics.
Antimatter Chemistry
1.12.2 1.4.10A scientific expert modpack with chemistry, physics and antimatter.
Another Quality Modpack 3 AQM3
1.18.2 1.7Even more quality in this third well-balanced season.


Another Quality Modpack 2 AQM2
1.19.2 2.0.1A second quality season with a refined mod selection.


All The Mons ATMons
1.21.1 1.0.0-rc6Reunites Cobblemon and ATM for a Pokémon adventure within ATM.
All The Mods Volcano Block Atmvb
1.19.2 1.0.8All ATM mods in an intense volcanic block challenge.


All The Mods Gravitas
1.20.1 0.9.2ATM with modified gravity for a unique and demanding space challenge.

All The Mods 11 ATM11
26.1.2 0.0.21All The Mods 10 To The Sky Atm10sky
1.21.1 2.0.2All ATM10 mods united in an intense skyblock challenge.
All The Mods 10 ATM10
1.21.1 7.0The all-in-one modpack reference with complete magic and technology.


All The Mods 9 To The Sky Atm9sky
1.20.1 1.1.9ATM9 in a skyblock format for a complete aerial challenge.


All The Mods 9 No Frills
1.20.1 0.2ATM9 without frills for a direct and efficient experience.

All The Mods 9 ATM9
1.20.1 1.1.1The ninth generation all-in-one modpack with massive content.
All The Mods 8 ATM8
1.19.2 1.1.0Magic, technology and exploration united in the eighth ATM generation.


All The Mods 7 To The Sky Atm7sky
1.18.2 1.2.3ATM7 in a skyblock format for a challenge in the clouds.

All The Mods 6 To The Sky ATM6sky Skyblock
1.16.5 1.2.3ATM6 in skyblock version for a complete aerial adventure.
All The Mods 6 ATM6
1.16.5 1.9.2Magic and technology united in the sixth generation of the ATM modpack.
All The Mods 5 ATM5
1.15.2 2.23The fifth generation of the complete Feed The Beast modpack.

All The Mods 3 Remix Atm3r
1.12.2 2.0.0A remixed version of ATM3 with adjustments and improvements.
All The Mods 3 ATM3
1.12.2 6.1.1The iconic third generation of the reference all-in-one modpack.

All The Magic Spellbound Atms
1.16.5 2.3.0All magic systems united in one enchanted modpack.

All The Magic Arcana
1.21.1 0.9.4Explore the magical arts in this modpack entirely centered on magic.
All The Horror 1.12.2
1.12.2 1.0All horror mods united in one terrifying modpack.
All Of Fabric 7 AOF7
1.20.1 2.5.3The best Fabric mods united for a complete experience.


All Of Fabric 5 AOF5
1.18.2 2.0.6The fifth iteration of the complete and well-balanced Fabric modpack.


All Of Create Aeronautics
1.21.1 1.9All In One Modded One Block
1.16.5 1.5.4A oneblock with all the mods for a total experience.
All In One Create
1.20.4 2.8All Create addons united in this engineering-dedicated modpack.

Agrarian Skies 2
1.7.10 2.0.6Farming and survival in the skies in this sequel to the agricultural skyblock.

Ages Of War NukesBombs And Guns
1.12.2Wage total wars with bombs, tanks and nuclear weapons.
Age Of Fate
1.20.1 4.7.0Choose your destiny in an RPG world rich with choices and consequences.
Age Of Engineering
1.10.2 1.1.2Progress through the ages of engineering in this expert modpack.
A Distant Journey
1.20.1 1.3.2A distant journey in a world rich with exploration and discoveries.
Abyssal Ascent
1.20.1 0.2.2.2Ascend from the deepest abyss toward the surface in this modpack.


Abyss Hunter
1.20.1 1.0Hunt abyss creatures in this intense underwater survival modpack.
A Shattered Prophecy The Broken Script
1.20.1 2.6A shattered prophecy to piece together in this RPG.